Sunday, July 25, 2021

Setting Up Arduino IDE to Compile Dual Screen Apollo DSKY Sketches

Here are the instructions to setup an Arduino IDE to successfully compile the source code for the Dual Screen Apollo DSKY and other Arduino sketches that use the GPIO fast pin library and/or the FastSeedTFTv2 graphics library for the Seeed TFT Touch Shield v2

For more information on the Dual Scrren Apollo DSKY:

https://arduinoenigma.blogspot.com/p/dual-screen-apollo-dsky.html

To update the arduino sketches:

The Arduino IDE must be installed first. This is generally an uncomplicated step that involves downloading the appropriate software from the Arduino website:

https://www.arduino.cc/en/software

The next step is to download the zip files for the following three projects, direct links to the zip files can be found below, all links open in a new window:

Project pages:

https://gitlab.com/arduinoenigma/dualscreendsky

https://gitlab.com/arduinoenigma/Arduino-GPIO

https://gitlab.com/arduinoenigma/FastSeedTFTv2

Direct links to the zip files:

https://gitlab.com/arduinoenigma/dualscreendsky/-/archive/main/dualscreendsky-main.zip

https://gitlab.com/arduinoenigma/Arduino-GPIO/-/archive/master/Arduino-GPIO-master.zip

https://gitlab.com/arduinoenigma/FastSeedTFTv2/-/archive/master/FastSeedTFTv2-master.zip

If prompted, save all the zip files to your Downloads folder, which should look like this:

Saturday, July 10, 2021

Setup Instructions for Dual Screen Apollo DSKY


For more information on the Dual Scrren Apollo DSKY

https://arduinoenigma.blogspot.com/p/dual-screen-apollo-dsky.html

To use with a computer:

1) Install Arduino Virtual Serial Port Drivers.

To function properly, the DSKY needs the Arduino Serial Port drivers installed in the host computer. If there is any version of the Arduino Software installed on the computer, this step can be skipped. 

If the Arduino Software is not installed, download it from:

http://arduino.cc  and click on the "Software" button on the bar at the top of the screen

or for a direct link to the English version:

https://www.arduino.cc/en/software

Follow the instructions for your operating system to install it.

2) Connect Arduino Mega on back of DSKY to host computer.

Once the Arduino Software has been installed, it is time to plug in the DSKY so it gets assigned a serial port number.

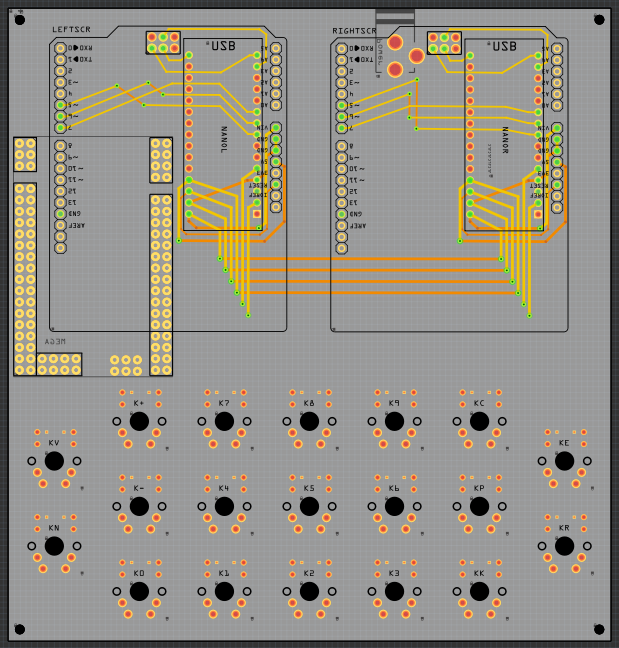
There are three Arduinos on the DSKY. The Two Arduino Nano in the front are only used to drive the Screens, they are not connected to the host computer except to modify the programs (sketches) running on them.

Flip the DSKY and connect the USB cable to the large Arduino Mega on the back. Connect the other end of the cable to the host computer.

The host computer will install the serial port drivers and assign a serial port number to the Arduino Mega. Communication can be verified by launching the Arduino Software. Click Tools -> Board -> Arduino/Genuino Mega or Mega 2560. Click Tools -> Port and select the newly created port. Click Tools -> Serial Monitor and on the bottom right of the screen, select 9600 baud. On the Top Line of the Serial Monitor type A and press Send, the "UPLINK ACTY" indicator should illuminate. Type Q and press Send and the "COMP ACTY" indicator should illuminate. Sending lowercase a and q will turn those indicators off. Exit the Serial Monitor, otherwise MoonJS cannot connect to an open serial port.

3) Install modified copy of MoonJS on host computer.

Download SerialMoonJS from:

https://gitlab.com/arduinoenigma/serialmoonjs

A direct link to the software is here:

https://gitlab.com/arduinoenigma/serialmoonjs/-/archive/master/serialmoonjs-master.zip

Unzip the file to a folder in the host computer.

4) Launch MoonJS and Connect to DSKY Serial Port.

Ensure the DSKY is first plugged in to the Arduino Mega port before launching MoonJS

Navigate to the folder where SerialMoonJS was unpacked.

The modified MoonJS software uses WebSerial, which runs on Chromium based browsers if a special command line flag is used when launching the browser.

There are two launchers included in the zip file

LAUNCH.CMD opens SerialMoonJS using Google Chrome

LAUNCH-EDGE.CMD uses Microsoft Edge

Other Chromium based browsers may be supported, the command line parameters are:

--allow-file-access-from-files --enable-experimental-web-platform-features

The first one is needed to allow html files to open files in the local computer. The second one enables WebSerial and a host of other experimental features. 

Needless to say this is not the most secure browsing environment, so a browser in this state should not be used to browse the web.

Click either on LAUNCH.CMD or LAUNCH-EDGE.CMD

The launcher makes sure the browser is installed and not currently running, showing error messages if either of those conditions are detected.

A final warning message to not use this browser on the open internet is displayed before proceeding to MoonJS, the AGC simulator. 

Once MoonJS launches, click on the "Connect" button on the top right side of the screen. A new dialog box will show a list of serial ports, select the "Arduino Mega 2560"and click the "Connect" button on the dialog box.

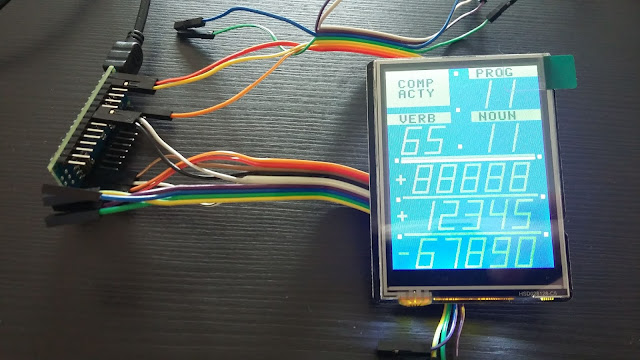
The screens on the external DSKY should update to match what is shown on the computer. To verify connectivity, on the external DSKY press: VERB 3 5 ENTR

A displays will show a flashing selft test on both the host computer and the external DSKY.

If the USB cable is disconnected without clicking the "Disconnect" button first, the page must be reloaded before being able to click the "Connect" button again.

To use MoonJS, click on the "Launch checklist" link on the top left of the screen and follow the instructions.

press V37E00E

click on "Enable IMU"

press V91E

press V35E

press PRO, repeat until NO ATT turns off

press V37E01E

when PROG changes to 02, click on "Launch"

(optional) Manual Control of External DSKY

follow the instructions above to use Serial Monitor to connect.

The left screens uses upper case A B C D E F G H I J K L M O to turn on each indicator, a lower case letter turns the indicator off. The right screen uses Q to turn the COMP ACTY indicator on. send P99 to display the PROG indicator, V99 displays the VERB indicator, N99, displays the NOUN indicator. The bottom three lines are controlled with X+88888 Y-99999 and Z300000. The first character of the X Y and Z commends must be a + or - anything else gets ignored. Press keys on the external DSKY and they will be shown in the Serial Monitor.

If you have made it this far, try pressing the NOUN key and without releasing it, press the RSET key.

Sunday, May 16, 2021

How to use PicoEnigma, an Enigma Z30 Simulator

PicoEnigma is an Enigma Z30 simulator, a rare, numbers only Enigma Machine. 

Its mode of operation is similar to other Enigma machines, it has a keyboard and a lampfield, pushing a key sends electricity to the entry rotor (ETW), then the electricity goes from right to left through the rotor pack, comes back through the reflector (UKW), and returns from left to right through another set of wires in the rotor pack, goes into the ETW and out to a lamp. 

In this machine, the rotors can be rearranged, the ring setting can be changed and the rotor starting position can be set. To successfully decrypt a message, the machine settings must be the same used to enctypt it.

This simulator is designed to operate the same as the Enigma Z30 Simulator for the KIM Uno:

https://arduinoenigma.blogspot.com/p/enigma-z30-for-kim-uno.html

After the simulator is turned on, it is ready to encrypt a message. The rotor starting position is 4321. Pressing a key advances the rotors and lights the result. The result will be illuminated while the key is being pushed. Releasing the key turns the lamps off. 

During machine operation, all the lamps will be off if none of the black keys are pressed, or one lamp will illuminate when a black key is pressed. Pressing the red key enters the configuration mode. To indicate at a glance that the machine is in the configuration mode, all of the lamps are lit except for one. 

When only the first lamp is turned off, the rotor types are being changed. Pushing the keys above or below the displays changes the rotor type for that position. Each rotor can only be used once. Once a unique rotor combination is selected, pushing the red key again advances to the next setting. 

When the second lamp is turned off, the ring settings are being changed. The up and down keys are used to change this setting, Each rotor can be set differently to a number from 0 to 9. Pressing the red menu key advances to the next setting.

When the third lamp is turned off, the stepping mode is being changed. There were two kinds of machines, one with a traditional lever stepping and another with geared stepping. The lever stepping machines suffered from a double stepping anomaly where a 9 in any position steps that wheel and the one to its left.  A double stepping sequence is: 0088 0089 0090 0101 Geared stepping works like a car odometer and no digits are skipped. 

The stepping mode is indicated by the digit on the right. If it shows a 0, the machine is using lever stepping, if it shows a 1, it is using geared stepping. In this screen, pushing the leftmost up and down button also changes the brightness of the lampfield digits. 

Pushing the red menu button again turns all the lamps off and returns to the operating mode screen.

Pushing the up and down buttons changes the rotor starting position. The machine is now ready to encrypt numbers. 

To send a text message, an encoding scheme must be devised. Either substitute letters by two numbers A 01 B 02 ... Y25 Z26 or use a codebook where words are substituted by numbers, first translate the message to numbers then encrypt the numbers. 

To decrypt the message ensure the machine is set up exactly as the machine used to send the message. Ensure the starting position is set the same as well.

For example, to encrypt the message TEST, use the table below.

 A  B  C  D  E  F  G  H  I  J  K  L  M

01 02 03 04 05 06 07 08 09 10 11 12 13

 N  O  P  Q  R  S  T  U  V  W  X  Y  Z

14 15 16 17 18 19 20 21 22 23 24 25 26

The word TEST would be encoded as 20 05 19 20

Typing and holding one number at a time in the machine using the default settings after power up yields 44 57 43 94

The wheels should be at position 4329 after all the numbers have been typed. 

To decrypt it, use the up and down keys to reset the wheels to the starting position of 4321. Then type the encrypted message (44 57 ...) and the original message (20 05 ...) will be displayed.


Thursday, January 21, 2021

Dual Screen DSKY talks to host computer via Virtual Serial Port

This is a new project, a DSKY, the Display Keyboard interface for the Apollo Guidance Computer (AGC), using two 240x320 LCD screens and a keypad made with Kailh Cherry clone keys.

This DSKY uses an Arduino Mega 2560 to interface with the host computer via a USB Virtual Serial Port. The Arduino Mega uses two of its auxiliary serial ports to communicate with the Arduino Nano on each screen. The Arduino Mega is also responsible for scanning the DSKY keyboard and sending keypresses back to the host computer. 

Each indicator on the left and right screen is controlled by a command from the host computer. For example to illuminate the indicators below, the host computer sends to the Mega the following string "C F P  V00 N00 X 00000 Y 00000 Z  000  ". The Mega receives commands from the host computer and forwards them to both screens. The left screen reacts to single character commands A..O. Upper case commands illuminate an indicator, lower case commands turn them off. The right screen uses the Q command to illuminate the COMP ACTY indicator and the P, V, N, X, Y, Z commands to display numeric data which may include a leading positive or negative sign.  


This DSKY is being made to interface to a modified version of Moonjs, An Online Apollo Guidance Computer (AGC) Simulator (https://svtsim.com/moonjs/agc.html). The simulator has been modified to use the experimental Web Serial API available in the Google Chrome browser in order to both send screen data to the external DSKY as well as be controlled by keypresses from the external DSKY. 

The modified simulator accepts keypress commands from the external DSKY via Serial Port. The commands correspond to the first letter of each key legend. For example if KEY REL is pressed in the external DSKY, it sends K to the simulator. Thus, to calibrate the IMU as part of the launch checklist, the simulator receives V 3 7 E 0 1 E from the external DSKY. 

The modified simulator is available at https://gitlab.com/arduinoenigma/serialmoonjs


A PCB is being designed to hold both screens and the keypad. Each screen connects to an Arduino Uno compatible pin header and is controlled by an Arduino Nano located under it. The Arduino Nano has been rotated so the USB connector is accessible  Only the minimum number of signals needed to control the display using SPI have been routed from the Nano to the LCD screen pins. The RX pin on each Nano is connected to a separate auxiliary TX pin on the Mega. 


The minimum number of signals needed to control the SPI LCD screen was experimentally determined by using jumper wires. 


Here is an OSHPark (https://oshpark.com/profiles/ArduinoEnigma) rendering of the board design so far: