Sunday, October 25, 2020

UHR Switch Bill Of Materials (BOM) and Assembly Instructions

For more information about the UhrSwitch:

Bill of Materials:


1) 1x UHR Switch PCB

2) 1x Meduino, (Mega 2560 Pro Mini). Make sure the pins to the right and the left of the USB connector match
https://www.ebay.com/sch/i.html?_nkw=meduino

3) 2x 0.56 inch RED 7 SEGMENT LED DISPLAY COMMON CATHODE. Get either 2x 5161AS or 2x 5611AH 
https://www.ebay.com/sch/i.html?_nkw=5161as

5) 1x Potentiometer Cap (you may want to substitute with something more appropriate)
https://www.ebay.com/sch/i.html?_nkw=potentiometer%20cap%206mm%20inside

7) 20x  0.5M Audio Cable 3.5mm Male to Male 90 Degree Angle. Get the 0.5M the 20cm is too short.
9) 4x M2 6mm Plastic Screw (Black)

10) 4x M2 6mm Brass Screw

Component Pictures:


Assembly Steps:


Read all of the assembly steps and look at the pictures at the bottom before starting any soldering. The components can be placed in the PCB before soldering them in order to verify that everything fits and is on the correct layer. Start soldering only once everything is understood. 

Identify Top and Bottom sides of PCB.
Top: only shows EXT and INT words in white
Bottom: Flag, word UHRSwitch

-Insert power switch on 3 pin header next to the words EXT and INT on top side of PCB and solder it.
-Insert 2x seven segment displays on headers on top side of PCB and solder them
-Insert ENC11 Rotary encoder on top side of PCB and solder it
-flip PCB to bottom side
-Insert pin headers for Meduino into bottom side of PCB. Insert the short end of the header pins into the PCB so they do not protrude too far out the front side. Flip the PCB and place on a flat surface. Solder pins on front side of PCB. Be careful not to touch the side of the seven segment displays with the soldering iron.
-Flip PCB and insert Meduino onto long side of pin header on bottom side of PCB. Solder it
-Insert PCB Spacer on DC Power Jaack and Insert Jack into bottom side of UHRSwitch PCB. The role of the Spacer is to keep the DC Power Jack pins from protruding too far out the front side of the PCB. Solder the Power Jack.
-Flip PCB to top side.
-Insert audio cables into holes on PCB from top side. The tails of the cables should point down, away from the seven segment displays.
-Flip PCB to bottom side.
-Solder one spot from the audio cable plug to the PCB.
-Once all soldering is completed, sand down any mouse bites sticking out the sides of the PCB.

Assembled Unit Pictures:


Friday, October 16, 2020

BinaryEnigma is possibly the smallest enigma machine ever built

[alank2] started a class of enigma machine simulators under 10x10cm and has now announced the latest addition to this family: BinaryEnigma

This class of machines was started to take advantage of the discounted rate when ordering pcbs sized 10x10cm and under from the Far East. The original, MicroEnigma using a 2 layer board and SMT components is described here:

https://enigmaworldcodegroup.freeforums.net/thread/91/microenigma

Another member of the family, PicoEnigma is a few millimeters smaller than MicroEnigma and uses all through hole parts, but needs a two board stack. 

https://arduinoenigma.blogspot.com/p/picoenigma.html

The smallest of the bunch, BinaryEnigma was announced in this forum post:

https://enigmaworldcodegroup.freeforums.net/thread/245/binaryenigma

It appears to use an Oshpark PCB with a minimal number of components, LEDs and pushbuttons in the front and an SMT ATtiny84a in the back along with a few support components. The whole thing is powered by a CR2032 lithium battery that lasts 200 hours of machine operation.

Here are a few videos of the members of this family:

MicroEnigma:


https://www.youtube.com/watch?v=TomMZATAFVY

PicoEnigma:

https://www.youtube.com/watch?v=e5l5f0q9yeA

BinaryEnigma:

https://www.youtube.com/watch?v=PVQSm2OKFzc


Saturday, September 12, 2020

Pico Enigma Machine Simulator Kit now available

Pico Enigma is now available in a Kit. This is very easy to assemble, with all the parts being thru-hole. The kit includes all the parts needed to assemble your own enigma machine simulator. The glue to put together the wood enclosure is not include. Gorilla Go2Gel is recommended. 


The kit is available at the link below:

http://tinyurl.com/enigmastore

For assembly instructions:

https://arduinoenigma.blogspot.com/2020/06/assembly-notes-for-picoenigma.html


Sunday, August 16, 2020

7 Segment LED Board now drives 16 LEDs

The seven segment LED board can now drive 16 LED using only an Arduino Nano.  Using the circuit described below it can drive 18 LEDs using a stock Arduino Uno/Nano and 20 if the LED on pin D13 is removed by desoldering it.

Here is a picture of the board showing the first 16 digits of PI

The first board gets two Arduinos. The first one, at the top of the board sends instructions to the second one at the bottom of the board. The bottom arduino is responsible for receiving serial instructions and driving the LEDs, If a packet received through the serial port is not meant for the current board, it gets relayed to the next board. The TX pin in the bottom Arduino is connected to the RX pin on the next board's Arduino Nano.


This is the same board when it could only drive 9 LEDs.

We have previously written about this project: 


By daisy chaining these boards, a larger installation can be assembled. Note the Arduino shadows, the board on the top left has two Arduinos, the rest of the boards, only one.


Here is a picture of the PCB as displayed by Fritzing. Note all the segment pins are connected in the top layer using vertical traces. The segment pins on each vertical stack are connected to other stacks using horizontal traces on the bottom layer and vias under each display. Notice the middle pin on the B displays is connected to the Arduino and an A and a B display are connected together. 

A 5611AS display is installed in all the sockets labelled A and a 5611BS display is installed in all the sockets labelled B. Another display like the higher brightness 5161 can be used, but be sure to get the 5161AS and 5161BS, do not mix 5611 with 5161 in the same board as the brightness will not be the same.


The schematic for this board is drawn below:

The A segment is connected  to all the displays. 

A Common Cathode (5611AS) display and a Common Anode (5611BS) display are connected in parallel. Their common pin are tied together and become the 1/2 select line..

Unlike charliexplexing, this arrangement allows a whole digit to be illuminated at a time. To illuminate a seven (7) in the first digit, a,b,c are set to output and high, and 1/2 select is set to output and low. All other pins are set to input and low, to prevent the internal pull up resistor from weakly driving the pin high. To illuminate a one (1) in the second digit, b and c are set to output and low, and 1/2 select line is set to output and high. The circuit can be extended with as many select lines as available.


Here is a sample pin assignment for an Arduino Nano. The display segments (a..g) are connected to I.O pins. The decimal point (dp) can be connected, or turned into an additional select line  

The D0/D1 pins should not be connected to avoid interfering with the built in Serial capabilities. 

The D13 pin has an LED connected to it and cannot be floated by turning it to input and low, so it should be left unconnected unless the LED is removed by desoldering it.

The A0..A5 pins can be used as digital outputs, with the exception of A6/A7 which are analog input only pins and should be left unconnected.


With the above setup, 18 digits can be controlled. If the decimal point is turned to a select line, a stock Nano can display 20 digits. If the LED on D13 is removed, 22 digits can be controlled. 

This board is bigger than the previous one, measuring 142 x 142mm.  

There is only one place that consistently manufactures board this size: PCBWay.com  The boards look good, function as designed and do not have extraneous markings like manufacturing codes placed. Other fab houses have returned boards to us with job numbers in prominent places in the front layer, or noticeable silkscreen issues.  

The Online Gerber Viewer was used to verify the accuracy of the files submitted:


Manufacturing took a couple of days, the progress of the board manufacturing could be tracked in the website: 


DHL delivered this package in 4 working days. In total, it took a week from submitting files to receiving the boards in the mail.

The boards were safely packaged and they came with a free 6 year anniversary sticker and badge.


The badge was designed by @akirasan (instagram: https://www.instagram.com/akirasan21h_) (twitter: https://twitter.com/akirasan)

The badge uses a 2032 battery (not included). A pin is included and is easily soldered into place. Once powered up, the onboard RGB leds light up and sweep through the color spectrum.


The next stage in this project is to consolidate multiple 16 display modules in the same PCB.

Sunday, August 9, 2020

Design of an Enigma Machine Rotor using PCB, pogo pins and 3D printed parts

Here are a set of PCB that are accurately wired like the rotors and reflectors of an Enigma Machine. This project was inspired by: https://hackaday.io/project/156935-enigma-machine


The gerbers are available at:
https://oshpark.com/profiles/ArduinoEnigma/


Rotor Wiring: 

First line: RIGHT SIDE - Bottom Layer
Second line: LEFT SIDE - Top Layer

ETW ABCDEFGHIJKLMNOPQRSTUVWXYZ
        ABCDEFGHIJKLMNOPQRSTUVWXYZ
I       ABCDEFGHIJKLMNOPQRSTUVWXYZ
        EKMFLGDQVZNTOWYHXUSPAIBRCJ
II      ABCDEFGHIJKLMNOPQRSTUVWXYZ
        AJDKSIRUXBLHWTMCQGZNPYFVOE
III     ABCDEFGHIJKLMNOPQRSTUVWXYZ
BDFHJLCPRTXVZNYEIWGAKMUSQO

IV ABCDEFGHIJKLMNOPQRSTUVWXYZ
ESOVPZJAYQUIRHXLNFTGKDCMWB
UKWB    ABCDEFGHIJKLMNOPQRSTUVWXYZ
        YRUHQSLDPXNGOKMIEBFZCWVJAT
UKWC ABCDEFGHIJKLMNOPQRSTUVWXYZ
FVPJIAOYEDRZXWGCTKUQSBNMHL

To use:

The rotor PCB are bolted to a 3D printed part. The order, from left to right is:
PCB, 3D printed Part, Head of Pogo pin.

The PCB markings are meant to be exposed and on the left side of the PCB when bolted to a 3D printed part. 

The ETW takes no pogo pins. The wires from the keyboard are soldered to either the exposed vias or the A1..Z1 contacts on the right side.

The UKW will have its dark side on on the left. The contacts will be on the right and hidden when bolted to a 3D printed part.

To make a machine, the minimum set of parts, from left to right are:
UKW(B or C), Rotor 3, Rotor 2, Rotor 1, ETW.

The wires from the keyboard switches go to the ETW (stationary entry wheel), the signals then go through the three rotors, in and out of the UWK (stationary reflector), back through another parh through the three rotors, then out of the ETW to the lampfield.


Sunday, June 28, 2020

Lessons learned from the last few projects

It is said that a picture is worth a 1000 words. This post condenses two years of learning into some instagram posts. 

Quoting another maker: "Just look, maintaining internal silence, until the meaning of my work becomes clear".

Here is a sample of my abilities before embarking on the projects on this page. This board was autorouted by Fritzing.
https://www.instagram.com/p/BRt6_bBhZ64/

Enigma Uno

Keep part count low. Every added part adds complexity to a kit.

How to design laser cut enclosure with finger joints using Sketchup and Inkscape


Pay attention to how the grain runs on the wood. In Ponoko, it runs from left to right. All the vertical pieces tend to crack when a nail is driven into them.

External Lamp Field

How to use charlieplexing to illuminate a large number of LED <n> output lines control n*(n-1) LED

Route PCB using horizontal lines in the front and vertical lines in the back


Do not solder/work when tired:

Sinclair Scientific Calculator:

Pins A6 and A7 in the Arduino Nano are analog input only. They can be used to read buttons provided a pull-up or pull-down resistor is used.

Route tracks on seven segment display modules by laying down horizontal tracks under the displays and vertical lines in the back to connect the same pins on each LED module together.

Sometimes it is necessary to eliminate the current limiting resistor in order to obtain decent brightness out of LED modules (older style bubble LED displays).

When unsure how something will fit, order a small board and try different spacings. You do not need to provide holes for all the pins. Be considerate of Oshpark and size your board so they don't lose money on shipping:

How to design LED and Keyboard multiplexing circuits in order to drive and read the largest possible number of displays and buttons. What happens when multiple keys are pushed at the same time.

If this is the first time you are doing something, breadboard it

Don't forget the mounting holes, make sure the PCB has four holes in the corners. Holes are free.

Don't forget any extra holes for things like lid hinges. Again, holes are free.

A PCB does not have to be square. It can have gently rounded corners or other shapes. The inner sharp corners shown here are impossible as the board fab house will cut the outline of the board with a rotating bit, they will come out webbed. 

Tent those vias

The Arduino VIN pin takes anywhere from 3.9V to 12V. Operation from 4 AAA to a 9V battery is possible. A power switch can be used to select between two power sources. They do not need to be the same voltage, as long as only one is connected at a time.

Measure battery endurance to find out how long will a device run on batteries., either use a light sensitive CdS cell and an external arduino to record changes in resistance or save a value evey minute to EEPROM

Test displays before soldering. Assemble one device and keep the displays unsoldered or make a dedicated device with a Zero Insertion Force (ZIF) socket.

Put years / version numbers on the PCB. Text is free.

LED Dimming using PWM

Use solder with water soluble flux, makes cleaning things easier

7 Segment Digits can be vertically scrolled. The bit representation of the digits can be rearranged so a shift left or shift right will move the bits from the previous to the new segment.

MegaEnigma/PicoEnigma:

14 Segment Displays can be vertically scrolled:

Use the F("") statement to store data tables in program ROM.

Pin D13 is connected to an external LED that can bias the pin. Avoid connecting this pin as an input. Either remove the LED or always set the pin as output and write high or low to force it to a known value.

Print a PCB design to paper and make sure components fit:

Don't trust Fritzing

Do not AliExpress when tired, you may buy a bag of unneeded components 

Sometimes soldering is the right solution, sometimes gluing is the right solution

Use the internal pull up resistor in order to connect the end of one or more push buttons to a pin, the other end to ground. Set the pin as input and write high to it. Reads 1 if nothing is pushed, 0 if pushed.

Use a fast pin library to read I/O. May need to write a wrapper function with a select statement to translate the pin number to the named variable used to access the pin.

Twist ties can be used to keep a top hinged lid in place, just make sure the PCB has a hole to secure it. Holes are free.
 
If your project has only LEDs and push buttons, there is no need for any extra external components. With careful coding they can be connected directly to an Arduino.

Use state machines as much as possible. Need to read many keys, that's one state machine. Need to drive many leds, that's another state machine. Need to do some time consuming processing and want to keep the keyboard and leds refreshed, split the time consuming task into simpler tasks using a state machine.

Route a PCB using the horizontal in front/vertical in back rule, then use vias placed under the components to minimize the amount of copper in the front layer.  

A daughter board can be used to hide the Arduino and the power connections on your project. It is cheaper to have 2 boards smaller than 100x100mm than one large board.

The new oshpark afterdark service can be used to embed some color on your boards. Try adding some logos or text to the copper layer.

Double check everything, why do we have a small logo on a side panel. Where are the hinge pockets

Double check your connections:

Try to put a standard Arduino power jack on your pcb

Try to put a battery compartment on your enclosures:

A 2 way switch can be used to select between an internal battery compartment and the power jack

Saturday, June 27, 2020

Pico Enigma and Mega Enigma Simulator Test Strings

Test strings to verify the correctness of PicoEnigma and MegaEnigma encryption:

To use the following string, press the menu button and change the machine to one of the models listed below, then paste the string into the Arduino Serial Port Monitor. The !AAA at the beginning changes the wheels to a know position before the lowercase characters are decoded. All of the test strings will result in AAAA when pasted to the correct machine. 

Machine Test String
I A !AAA sqcxf kbqcs rhjmm xtbuf zdmfc piinr dzwcs vutrv rbzus wgfcn cinio
I B !AAA ftzmg isxip jwgdn jjcoq tyrig dmxfi esrwz gtoiu iekkd cshtp yoepv 
I C !AAA twtvp tyixf fppyw svuso lidxh bbdok ztlzn fdube olqxf lhkhw vypem 
M3 B !AAA ftzmg isxip jwgdn jjcoq tyrig dmxfi esrwz gtoiu iekkd cshtp yoepv 
M3 C !AAA twtvp tyixf fppyw svuso lidxh bbdok ztlzn fdube olqxf lhkhw vypem 
M3 D !AAA jgtzx leioy lpwbe hfspo xlbrz zcbgo zfxvf hqjkj fkhmq ndvhr qzczi 
M3 D1 !AAA uipgp ofxtk mkeve tnbwq ohxgu keqoj bzvuc qqufm yfdgj udiuc kfzwq 
M3 D2 !AAA mnkhg vrjgm qrixe nolyc nxvow hdcfx ruqnb zqodc ixppd pdcwb oethu 
M3 D3 !AAA cfomw uxwfg cukke jyzom puzur rosde wsdmt kqqyo jznyi bdrxm ytbpr 
M4 B !AAAA ftzm gisx ipjw gdnj jcoq tyri gdmx fies rwzg toiu iekk dcsh tpyo 
M4 C !AAAA twtv ptyi xffp pyws vuso lidx hbbd okzt lznf dube olqx flhk hwvy 
N !AAA qwscm ijhvv vlrhx igxcw oddwu wzsjq wvfsk kxnqf gjqjn rupge ojrtv 
S !AAA zgdyt swlpz gmjdu zqqzd ewjzj drxpr whwmg jzvek uvnbe ptrkw hgfox 
D !AAAA hlkud thsyv icwnz wwdmw kgeog zyeqi hdtww lzeeu eifjx pgbke hiubr gcufi
K !AAAA inrkj yxuku tpiil mlqrg dofum bxrtz egtki tytpm zdzni usesg zyido 
R !AAAA tepwb pytxx msyid pumxb rqlwo nrzrf pikxr bdzcf oywyj uhumf unykn 
T !AAAA wlznv crjqp pgbdv nxgmg jgxcc iuwor lzcku oukit blizr ctoiu irfnt 
KD K !AAA wchug kzzsf nkioe liwwr ocksi etxxq pzfic euzff cwvsu fwmdg ertbn 
A865 !AAAA egwzq hddmg kuwqt xhuqv xrztx kehje gqtjo jkerw mpdec rttsv puejq 
G111 !AAAA qkuib bgtis ofzts jgmxi efgpi ubeuo bhujy ckssh jtxte wygmv nixec 
G260 !AAAA cknul qypie mmxyg htegz cdlvg tyxdb zgnvs kvqyh glvmz pyceu yczpn 
G312 !AAAA gjuiy cmdgu vttff qpzmx kvctz usobz ldzum hqmjx wtzwm qnnuw idyeq 

The test strings have been verified against Daniel Palloks Universal Enigma Machine Simulator and will also return all A if the wheel changing string !AAAA is removed and only the lowercase characteres are pasted.


To test the strings with either Pico or Mega Enigma using a computer.

1) Plug in either simulator into a computer.

2) Open The Arduino Serial Monitor

3) Press the red button, MACH will be displayed and illuminated in the lamp field

4) Use the up/down keys below the rotors or press K until KD K is displayed.

5) Press the red button repeatedly to exit the menu until all the lights in the lampfield turn off.

6) Copy the whole string on the KD K row: !AAA wchug kz...

7) Paste it into the Serial Monitor, all A will be displayed.


To test the strings with either Pico or Mega Enigma 

1) Press the red button, MACH will be displayed and illuminated in the lamp field

2) Use the up/down keys below the rotors or press K until KD K is displayed.

3) Press the red button repeatedly to exit the menu until all the lights in the lampfield turn off.

4) Start typing the whole string on the KD K row: "wchug kz..."

5) The letter A will be illuminated in the lamp field.


To test the strings with Palloks Universal Enigma:

1) Open this link:

2) On the drop down menu on the top right corner of the page, select KD (rewirable UKWD).

3) On the list above, copy the text on the KD K line starting from wchug kz...

4) Paste it on the input side of the Universal Enigma Machine Simulator. The output panel on the right should display all A.

Sunday, June 7, 2020

Assembly Notes for PicoEnigma

Pico Enigma Assembly Notes:

CPU Board Assembly:
-Program the Arduino Mega (A kit will come with a preprogrammed Arduino)
-Prepare a 10 pin length, a 4 pin length, a 2 pin length and 1 pin length of header pins.
-Insert the pin headers, long side towards flag side of CPU Board. Plastic headers should be on the non-flag side of the board.
-Insert the Arduino Mega on the short pins. The Arduino should be on the non-flag side of the board.
-Flip the board flag side up and while pushing down, solder 1 pin of each header.
-Flip the board, verify alignment and solder 1 pin of each header to the Arduino.
-Solder the rest of the pins.
-From the long female pin header, break 4 x 10 pin lenghts, clean the ragged edges.
-Insert the female pins on the Arduino side of the CPU Board
-Temporarily mate the Top Board to the CPU Board
-Solder one pin of each female header
-Verify the alignment and solder the rest of the pins.
-Separate the CPU Board
-Insert the Power Connector on the Arduino Side of the CPU Board
-Flip the board and tack solder one corner of each pin. Do not apply excess heat to this connector.
-Allow to cool and go back and finish soldering the pins. Do not apply excess heat to this connector.

Top Board Assembly:
-Break 2 strips, 10 pins long from the double pin header.
-Fully insert the pin strips (short side up) from the bottom of the PCB,
-While pushing down on the PCB, solder 1 pin.
-Verify the pin strips are fully inserted and aligned properly.
-Solder the rest of the pins.

-Insert Buttons into PCB (1 red button under Enigma Logo, the rest, black)
-Solder one leg of Buttons while pushing down the PCB to keep them in alignment.
-Verify button alignment
-Solder the rest of the buttons.
-Test LEDs (temporarily mate the CPU and TOP boards, power the CPU board using the USB Cable and push the MENU key, insert an LED into the A lamp, it should light up) 

-Insert LEDs into Lamp Field (short leg points towards buttons, long leg on display side)
-Double check short leg of each LED is in bottom hole.
-Solder one side of LEDs while pushing down on the PCB to keep them in alignment
-Verify LED alignment (double check LED polarity again before committing to soldering them all)
-Solder the other leg of the LEDs
-Verify the 14 Segment Displays
-Insert 14 Segment Displays on PCB (ensure the dot points down towards the lampfield)
-Solder one pin of each 14 Segment Display
-Verify 14 Segment Display alignment
-Solder the other pins

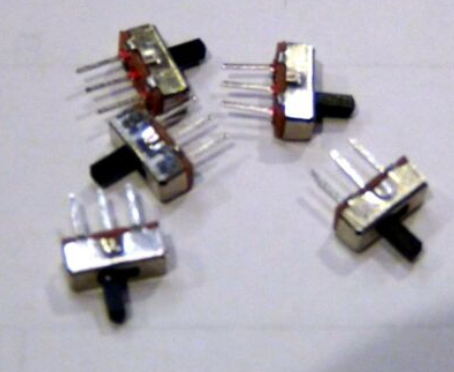
-Insert the power switch
-While pushing down on the PCB and watching the alignment, solder one pin.
-Verify alignment
-Solder the rest of the pins
-Trim the LED legs
-Trim the Power Switch legs very short, otherwise it interferes with the power connector.

PCB Bring Up (Initial Power Up)
-Mate the top board to the CPU Board
-Using a 9V battery and a male power plug, apply power to the board
-Flip the power switch to the EXT position.
-The board should power up and display AAAA (if not, check the solder joints, make sure the Arduino is powered up, connect to the board using the Arduino Serial Monitor at 9600 baud, upon powerup it will display PicoEnigma in the Serial Monitor)
-Repeatedly push the red menu button until V16 is shown. 
-Push one of the buttons adjacent to the 14 Segment Displays.
-The display should change to 8888 (if not, check the solder joints of the buttons)
-The lamp fields LEDs will turn on sequentially (if not, check the solder joints).
-Press each key, the corresponding lamp should turn off. (if not, check solder joints)
-Once all the keys have been pressed, the simulator will return to AAAA, use the buttons above and below each letter to change them. Verify the X and T letters display properly. In addition to 8888, this tests all segments. If one segment is not working, check the solder joints).
-Separate the CPU and Main Boards and clean the solder flux (if using water soluble flux, simply wash the boards under running water while scrubbing with a toothbrush)
-Dry the boards thoroughly, use a blower or canned cleaning duster to blow all the water from under the Arduino, the push buttons and the display.
Once the boards are thoroughly dry (do not rush this step), power them up and repeat the key/led test procedure above. If a key does not work or a single key turns off multiple lamps, dry those keys thoroughly.
-If the boards have mouse bites, this is the time to sand them off. Dry, clean and re-test the boards.

Battery Compartment Assembly:
-Locate the base piece of the case. Insert 4 screws in each corner of the battery compartment.
-Drive the screws in until they barely protrude from the other side.
-The first battery compartment piece has a hex nut opening, this allows retaining washers to be used on the battery door.
-Align the holes on the battery compartment piece on the protruding screws.
-While firmly pressing the battery compartment piece to the case base piece, drive the screws in, one at a time, ensure the battery piece is tight against the base piece. Drive the screws in until they begin to slightly protrude from the battery piece.
-The next battery compartment piece has a small round opening. Drive the screws in.
-The next piece will have a hex nut opening, install a nut in each opening. Drive the screws in.
-Install the rest of the pieces, Drive the screws in.
-Finally, install the flat piece with the single hole. The hole needs to be on the same side as the enigma logo and the power switch. Drive the screws in.
-Once the screws heads reach the case base piece, tighten them until the taper sinks into the base piece but do not over-tighten (hard woods such as walnut crack easily).
-Install a 9V battery on a power plug. Cut off and dispose of the male barrel plug (cut one wire at a time), The wires coming off the battery need to be as long as possible.
-Insert the leads from the battery into the battery compartment hole. Insert the battery into the compartment, wire first, the connector will be on the side opposite the hole. 
-Fold the battery leads flat against the top of the battery compartment.
-Fold them down the long side of the battery compartment.
-Install a tie wrap on outside of the battery compartment, holding the battery leads against it. This will prevent pulling on the solder joints if the battery is pulled.
-Put a piece of tape over the battery wires to prevent the keyboard buttons from cutting into them.
-Disconnect the battery
-Solder the battery wires to the CPU Board (separate from main board first).
-Install the battery
-Close the battery compartment.

Assembly:
-Install the 25mm brass standoff on the main board, use the plastic screws to attach them.
-Tie a simple knot on the twist wrap that serves to hold the lid in place. Insert from the bottom of the main board. Apply a drop of glue to the bottom of the board to secure the knot in place.
-Put a piece of tape over the keyboard pins to prevent them from cutting into the battery wire.
-Once the glue dries, connect the Main Board to the CPU Board (the CPU board needs to be connected to be battery compartment at this point). Ensure the Main Board pins are driven all the way into the CPU board headers.
-Using brass screws, secure the standoffs to the case base plate. 
-Turn the power switch to the INT position, the simulator should power up, if not, check the battery lead solder joints.

Case Assembly:
-Prepare the lid pieces, remove any remaining laser film.
-Install the screw that will hold the other end of the twist tie on the side piece. The screw should be above the hole in the PCB where the other side of the twist tie is installed. If using hardwoods, drive the screw in half a turn, then remove it and drill out the hole. Walnut cracks easily and if the screw is simply driven in, it will crack the side piece in half. Cut the tip of the screw off and install on the drilled hole.
-Mock assemble the lid piece, making sure the Enigma logo is to the inside and that the piece with the hinge pockets is near the Enigma Logo. The side piece with the screw should be on the left side of the lid, screw facing up.
-Moisten a paper towel and clean your fingers, cleanliness is paramount at this stage to prevent glue from finding its way into a flat surface.
-Lay down some paper towel and put all the lid pieces in their correct positions, The Enigma logo needs to be facing up so that is readable.
-Apply a drop of glue to the inside of each finger joint of a side piece. Insert into the Enigma piece.
-Repeat until all 4 sides are installed.
-Careful of not touching the glue, push all 4 sides tightly.
-Flip the lid face down into a clean piece of paper and push down on it.
-Set aside to dry.

-Repeat the process for the bottom pieces of the case, mock the side pieces and arrange them around the base piece. 
-Apply glue the side pieces and install them one at a time.
-Apply pressure to each side piece to ensure there are no gaps around them.

-Install the hinges on the lid. 
-Drive the nails in by grabbing them with multi-tool pliers and pushing them into the wood.. Once they are embedded in the wood, use the tip of the pliers to push them in all the way. 
-Align the lid with the bottom case and install one nail. Verify the lid aligns with the case.
-Install the rest of the nails.
-Minor lid misalignments can be corrected by gently twisting the lid when closed.
-Connect a power plug on the back of the simulator and observe the lid angle that keeps the lid from touching the power plug. 
-Fold the twist tie around the screw in the lid so the lid stays open at that angle. Twist the tie around itself and back around the screw so it does not work itself loose.
-Align and glue a Merkblatt

Click past the break for pictures...

Sunday, May 31, 2020

Designing an UHR Switch for an Arduino based Enigma Machine Simulator

This article will explore some considerations when designing an UHR switch for a modern microcontroller based Enigma Machine Simulator.

The UHR Switch was an external attachment to the Enigma Machine. It is the small square device to the right of the Enigma Simulator shown below.


The UHR Switch connects to the plugboard and performs different substitutions depending on which of the 40 possible values is selected by using the rotary encoder on its face. 


The UHR Switch has 20 plugs, labelled 1a 1b 2a 2b 3a 3b .. 10a 10b.

A typical Enigma Code Sheet would list the 10 plugs to be installed as follows:
QP WY EX RC TV ZB UN IM JK OL

When using an UHR Switch, plug 1a would be connected to Q, 1b to P, 2a to W, 2b to Y, 3a to E, 3b to X, ending with 10a to O and 10b to L. Normally, a plug would substitute Q to P and P to Q, but the UHR switch may break that symmetry depending on the setting used. For compatibility with machines not using it, position 0 performs the same symmetric substitution as the plugs Q to P and P to Q. Positions that were multiples of 4 (4,8,12...) perform different symmetric substitutions, for example, position 4, as wired above would substitute Q to B and B to Q.

The image below, found under the Wiring section of the CryptoMusum UHR article, describes the input and scrambler disk wiring.


The link below lists all substitutions produced by the UHR. It can be used to verify the correctness of an implementation


UHR:6
abcdefghijklmnopqrstuvwxyz
aotdxfghbvewrjczmyspnqkiul
1a->8b  7b->9a
2a->9b  1b->6a
3a->3b  8b->4a
4a->2b  6b->10a
5a->1b  2b->7a
6a->10b 9b->3a
7a->7b  5b->1a
8a->6b  3b->8a
9a->5b  10b->2a
10a->4b 4b->5a

The enigma machine uses the plugboard twice for each letter encoded. When a key is pressed, it first goes through the plugboard to be either substituted by another letter or be left alone. Then it goes into the rotor pack, through the reflector and back trough the rotor pack to be encoded into a different letter. Lastly, it goes through the plugboard again before going to the lampfield. 

A microcontroller implementation of an Enigma Machine with a plugboard would perform all of the steps above. Typically, all 26 plugs would connect directly to a microcontroller with sufficient I/O pins or to an IO port expander. Either way, each pin needs to be bi-directional and can be used as an output or an input. When used as an input, an internal 10k pull up resistor can be activated so the port will read 1 if not connected to anything. 

To see if a plug is installed, first all the ports are switched to input and the internal pull up activated, then the port corresponding to the letter to be substituted is switched to output and driven low. One by one all the other ports are read, if a plug is not installed, it will read as 1. If a plug is installed, another port will read 0. If all the other ports are read and neither returns 0, a plug is not installed and that letter is not substituted. 

This behavior is performed twice, once when a key is pressed to see if it needs to be changed on the way to the rotor pack and once more as it comes out of the rotor pack to determine the letter to illuminate in the lamp field. 

Let's use Daniel Palloks Universal Enigma to analyze how the UHR works. A default M4 machine with B reflector and Beta thin wheel has been selected. The following plugs have been installed QP WY EX RC TV ZB UN IM JK OL. The plugboard has been activated and UHR has been set to position 06


The first two lines in the signal monitor show the substitutions performed by the UHR.

         abcdefghijklmnopqrstuvwxyz    top
         aotdxfghbvewrjczmyspnqkiul    bottom

these can be expanded using the actual plug substitutions listed above (1a->8b) as shown below:

         11 22 33 44 55 66 77 88 99 00
         ab ab ab ab ab ab ab ab ab ab
Plugged: QP WY EX RC TV ZB UN IM JK OL top 
Uhr: 06  MZ KU XI YT PQ LO NJ BR VE CW bottom
         86 97 38 25 11 00 79 64 53 42
         ba ba ba ba ba ba ba ba ba ba
                    
Lets press A:


The arrows indicate the direction the signals are traveling. The topmost green arrow going down into A shows the keyboard going into the UHR, since this letter is not plugged, it goes into the ETW, the entry rotor as itself. It comes out of the rotor pack as F, and again, this letter is not wired to the UHR, so it goes out to the lamp field as itself.

Now lets press A again.


It goes in as A, an unplugged letter, so it goes into the rotors as A, comes back out as T, a plugged letter and the UHR performs a bottom to top lookup and goes out to the lampfield as C.

Now lets press a plugged key, P:


It goes in as P, a plugged letter and the UHR performs a top to bottom lookup, sending it into the rotor pack as Z. It goes through the rotors and comes out as A, an unplugged letter, so it continues as an A to the lampfield..

Lastly, lets press P again:


It goes in as P, a plugged letter and the UHR performs a top to bottom lookup, sending it into the rotor pack as Z. It goes through the rotor pack and comes out as O, a plugged letter and the UHR performs a bottom to top lookup and goes out to the lampfield as B.

Now, lets press P until the green arrow going from the keyboard into the UHR and the red arrow coming from the rotors out into the UHR align:


P gets translated by the UHR as Z when going from the keyboard into the rotors and the resulting P gets translated by the UHR as T when going out from the rotors into the plugboard.

And this is the point where one realizes that a software implementation of the UHR switch on a simulator that has a plugboard with a single plug per letter is not a straightforward task. The UHR needs to know whether the signal is going into the rotors or coming out of the rotors.

The real enigma machine uses two connectors per plug, A normal wired plug crosses the top connector on one side to the bottom connector on the other side and vice versa. The plug has an internal shorting bar that connects to top connector and the bottom connector. The plug pushes that shorting bar with an insulated tip and connects the top and bottom of one letter to the bottom and top of another letter. The UHR connects the top side of the plugs to the bottom side of the plugs using the A and B connectors. 

A software UHR with single connector per letter needs to somehow differentiate whether the signal is going into the rotors and it needs to perform a top to bottom translation or it is coming out of the rotors and into the UHR and it needs to perform a bottom to top translation. 

The different substitutions have been highlighted below. The entry substitution is the highlighted P on the top left side of the diagram, that gets translated through a top to bottom lookup into a Z. The exit substitution is the highlighted P on the bottom right part of the diagram, that gets translated through a bottom to top lookup into a T.

         11 22 33 44 55 66 77 88 99 00
         ab ab ab ab ab ab ab ab ab ab
Plugged: QP WY EX RC TV ZB UN IM JK OL top 
Uhr: 06  MZ KU XI YT PQ LO NJ BR VE CW bottom
         86 97 38 25 11 00 79 64 53 42
         ba ba ba ba ba ba ba ba ba ba

Another thing to keep in mind is that the UHR does not see all the letters being encoded. 

A->F (A is unplugged, F is unplugged, the UHR sees neither)
A->C (A is unplugged, C is plugged, the UHR sees only the exit path)
P->A  (P is plugged, A is unplugged, the UHR only sees the entry path)
P->B  (P is plugged, B is plugged, the UHR sees two signals, one as an entry, one as an exit)

Furthermore, in the P->Z translation and P->T translation, the UHR sees both as P, but in one case the correct translation is Z and in the other one is T.

So, the UHR is not in a position to monitor all the letters being encoded and a letter sometimes needs to be translated as an entry signal (top to bottom) and sometimes as an exit signal (bottom to top).

An initial solution was to have a state variable in the UHR device. The first signal would be translated as top to bottom. Then when the first signal is released, activating a second signal would get translated as a bottom to top. The enigma machine would then perform two plugboard queries when a key is pressed. The first query would return the top to bottom substitution and the result would get used to send it through the rotors. The second query would be performed just to keep the UHR in sync with the enigma, its result would not get used. The letter would then get sent through the rotors and it would come out as a different letter. The output letter would be queried through the plugboard again. The first query would be translated by the UHR as a top to bottom translation and it would get disregarded by the enigma logic. The enigma logic would then query the plugboard again and the UHR would perform a bottom to top translation. The enigma logic would use that result to illuminate the lampfield. This logic works but it tends to get lost if the UHR is changed while a key in the enigma is pressed.

Since the UHR is in no position to see all the encoded letters, it needs to return the top to bottom and bottom to top translations for a given letter. A better solution is described below.

When the Enigma activates a letter in the plugboard, the UHR first activates in response the result from the top to bottom lookup. This is noticed by the pluigboard reading logic in the enigma simulator. After a period of time, the UHR releases the first response, and activates the result corresponding to the bottom to top lookup. It is up to the enigma and plugboard logic to decide whether the first or the second result gets used. 

The UHR code below performs the top to bottom lookup and activates that plug

The plugboard logic detects the first and second responses and returns the one value the enigma needs

The enigma logic requests the first value going into the rotors

And the second value when going out of the rotors and into the lampfield
 
And now it makes sense why the UhrBox-E kit included a replacement CPU for the Enigma-E. If an enigma simulator is developed first, all the subtleties of developing an external UHR switch are not going to be known before hand. A protocol and timing between the Enigma and the UHR needs to be developed.