Here are the instructions to setup an Arduino IDE to successfully compile the source code for the Dual Screen Apollo DSKY and other Arduino sketches that use the GPIO fast pin library and/or the FastSeedTFTv2 graphics library for the Seeed TFT Touch Shield v2
For more information on the Dual Scrren Apollo DSKY:
https://arduinoenigma.blogspot.com/p/dual-screen-apollo-dsky.html
To update the arduino sketches:
The Arduino IDE must be installed first. This is generally an uncomplicated step that involves downloading the appropriate software from the Arduino website:
https://www.arduino.cc/en/software
The next step is to download the zip files for the following three projects, direct links to the zip files can be found below, all links open in a new window:
Project pages:
https://gitlab.com/arduinoenigma/dualscreendsky
https://gitlab.com/arduinoenigma/Arduino-GPIO
https://gitlab.com/arduinoenigma/FastSeedTFTv2
Direct links to the zip files:
https://gitlab.com/arduinoenigma/dualscreendsky/-/archive/main/dualscreendsky-main.zip
https://gitlab.com/arduinoenigma/Arduino-GPIO/-/archive/master/Arduino-GPIO-master.zip
https://gitlab.com/arduinoenigma/FastSeedTFTv2/-/archive/master/FastSeedTFTv2-master.zip
If prompted, save all the zip files to your Downloads folder, which should look like this: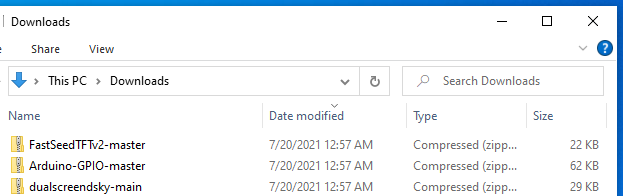
Open the dualscreendsky-main.zip file, select and copy (Ctrl+C) the two folders, DSKYMegaMainProcessor and DSKYUniversalScreen, the README.md file can be ignored.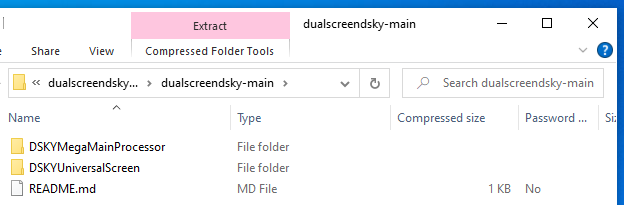
Navigate to the Arduino folder, located just below the Documents folder and Paste (Ctrl+V) the two folders copied on the step above. The Arduino folder should look like this now:

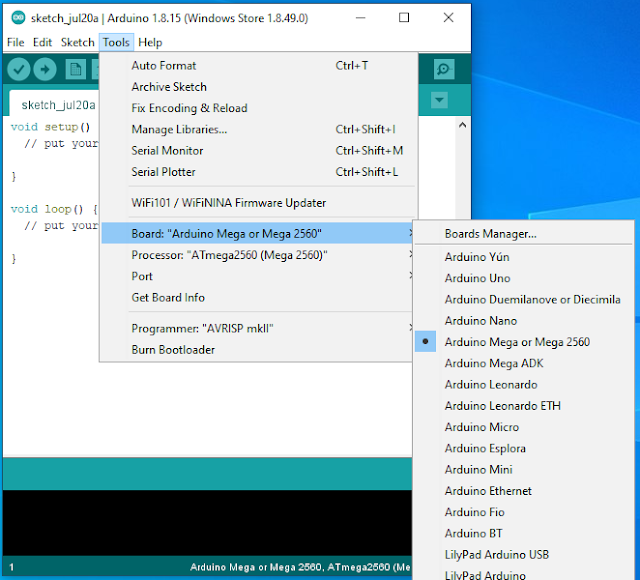
Launch the Arduino IDE. Click Tools->Board and select "Arduino Mega or Mega 2560":
Click File->Open and navigate to the DSKYMegaMainProcessor folder. Click on the Arduino Sketch to open it.

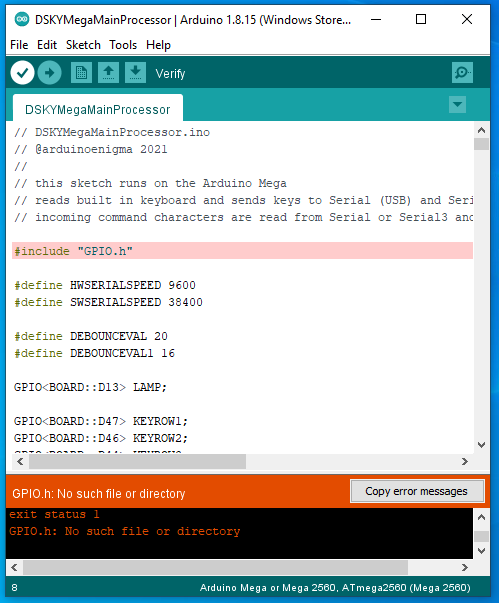
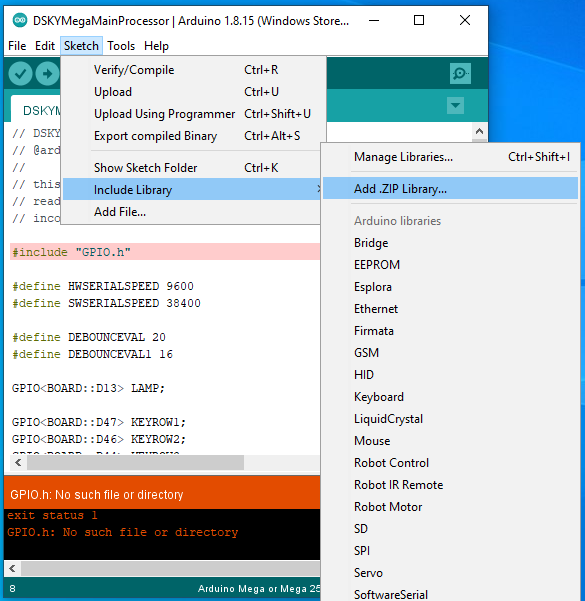
Click on the "Verify" checkmark button on the toolbar. If the GPIO library has not been installed on your computer, the compilation will fail:
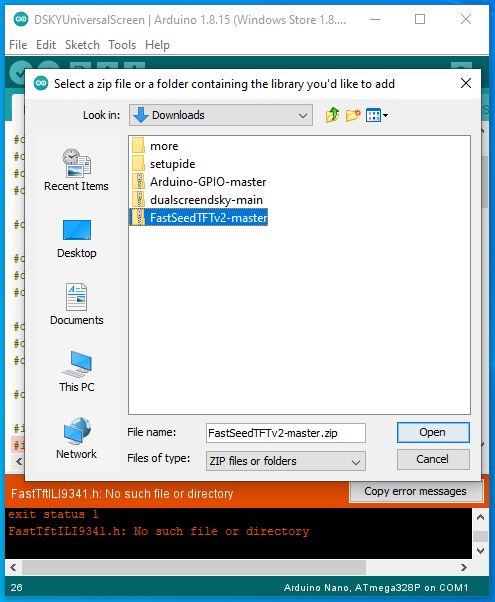
If the compilation fails, the GPIO library needs to be added to the Arduino IDE. This step needs to be done only once. That's why we tried to compile the sketch first, to see if the library was already installed. To install the library, click Sketch->Include Library->Add .ZIP Library
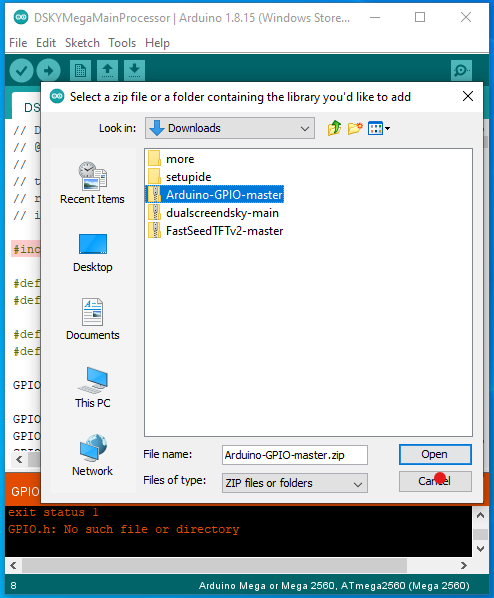
Navigate to the Downloads folder and click on the Arduino-GPIO-master file. Click Open. That's it, the GPIO library is now installed and ready to use. This one time step does not need to be repeated:
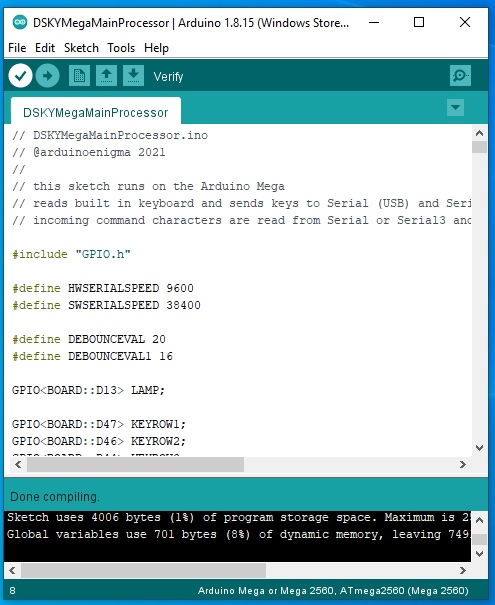
Click the Verify button again and this time the sketch should compile successfully:
Plug in the USB cable to the Arduino Mega located on the back of the DSKY. A new serial port will be assigned when plugging it in for the first time. After a popup appears indicating that the hardware is ready to use, click on Tool->Port and select the Arduino Mega port, make absolutely sure that the selected Board is "Arduino Mega or Mega 2560" and the Processor is "Atmega 2560 (Mega 2560)":

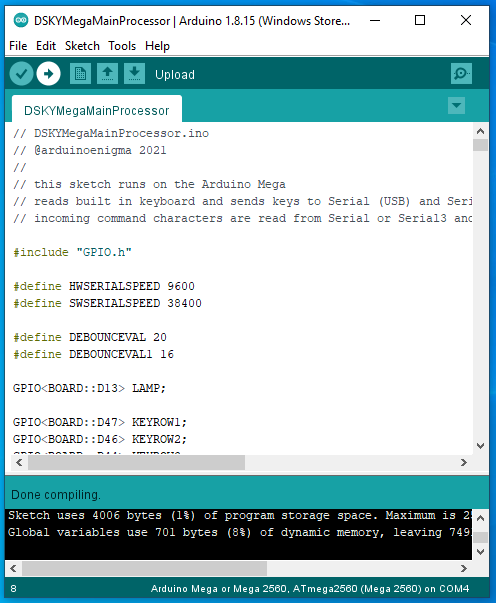
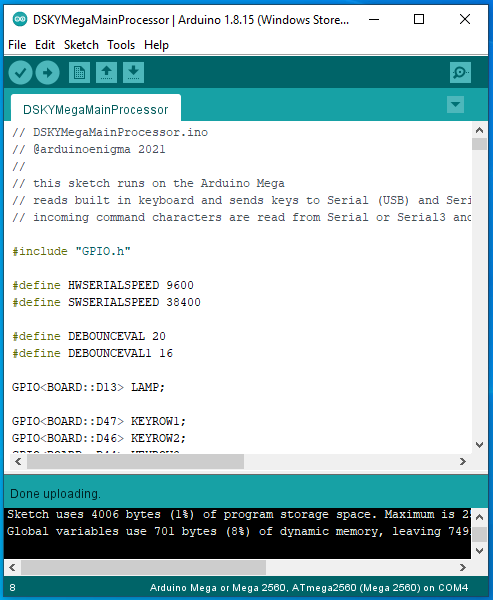
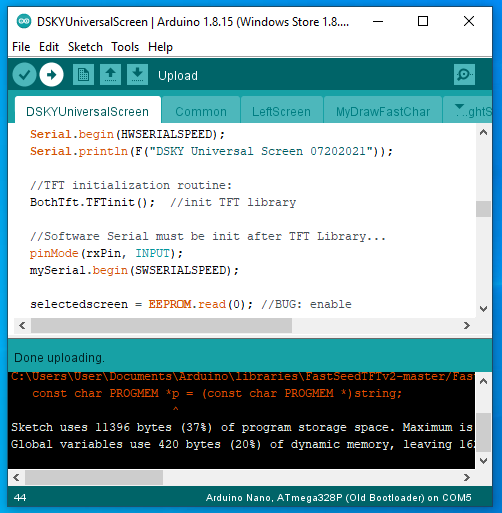
Click the Upload button to compile and upload the sketch to the Arduino Mega on the DSKY. It should display two progress bars, one for compilation as shown below, followed by another for uploading. Wait until the uploading is done before doing anything else.
Another progress bar will be shown when uploading the sketch. After the process succeeds, the IDE will shown "Done uploading". The Mega sketch does not output a version number to the serial port, so we are done with it at this point.
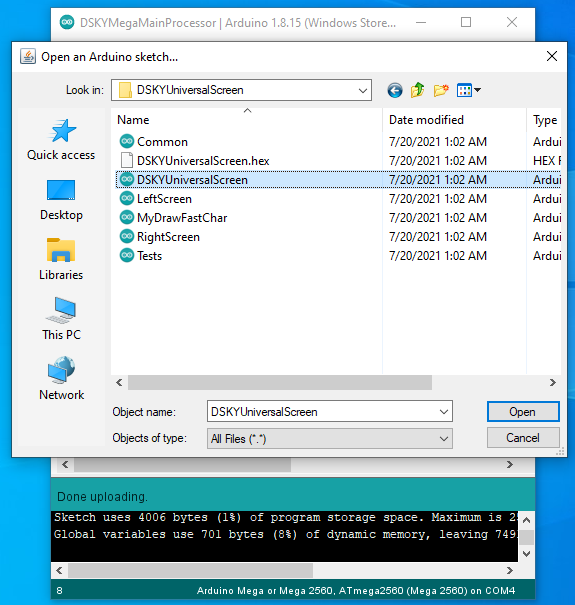
Unplug the Arduino Mega. Click File->Open and navigate to the DSKYUniversalScreen folder. Select the DSKYUniversalScreen sketch:
A new Arduino window will open. To avoid confusion, close the DSKYMegaMainProcessor window.

The left and right screens are run by an Arduino Nano located underneath each one. To compile the screen sketch, first select the Arduino Nano by clicking Tools->Board->Arduino Nano.

Make absolutely sure that the Arduino Mega has been unplugged by going to Tools->Port and verify that the Mega is no longer shown. If it is still there, unplug it.

Click the Verify button to try to compile the Universal Screen sketch. If the graphics library has not been installed in the computer, the compilation will fail:
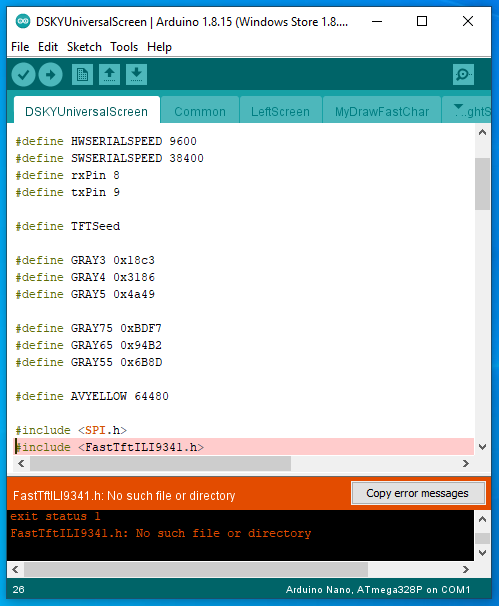
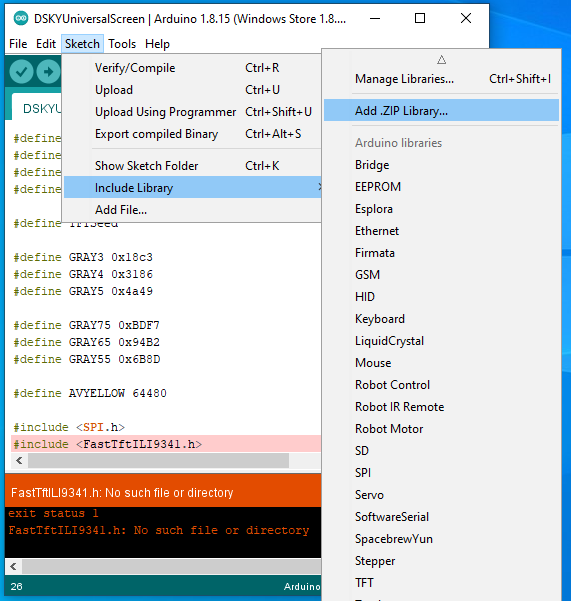
If the compilation failed because the FastTFTILI9341 library was not found, add it by going to Sketch->Include Library->Add .ZIP Library
Navigate to the Downloads folder and select the FastSeedTFTv2-master file and click Open. This is a one time step.
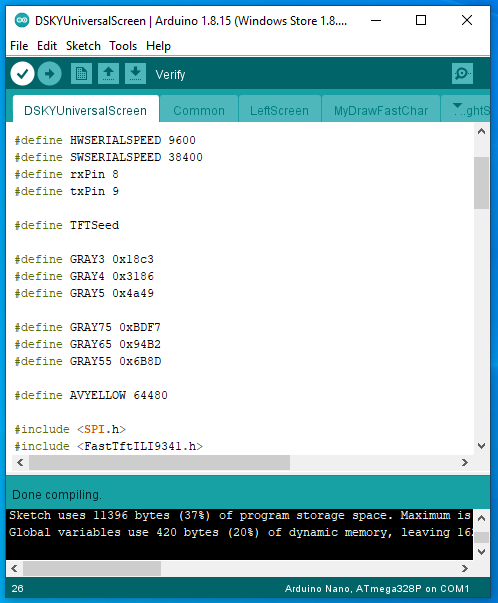
Click the "Verify" button again and the sketch should compile:
Time to plug the USB cable to the Arduino Nano located underneath the right screen. If the USB drivers have never been installed, the port list under Tools->Port should not change.

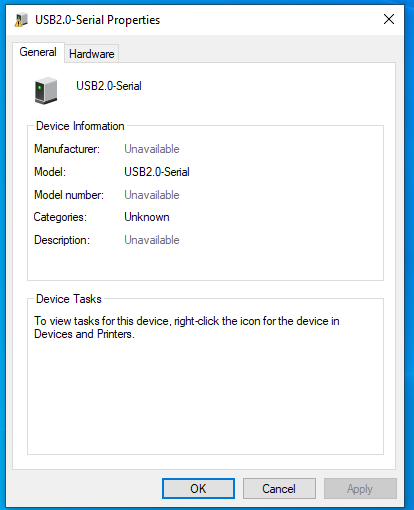
Optionally, the device can be verified in the Control Panel as being unrecognized.
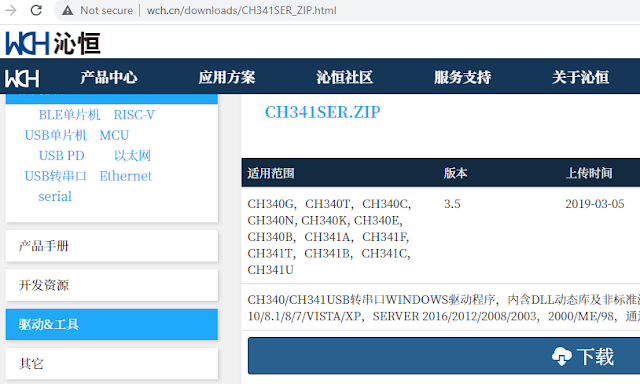
A one time setup is needed. First, download the CH340G drivers for the Arduino Nano clone by visiting the manufacturer's download website (opens in a new window):
Click the Blue Button with a Cloud and Down Arrow icon located just below the model numbers supported by this driver. Only the ZIP file is needed, do not download EXE or other files.
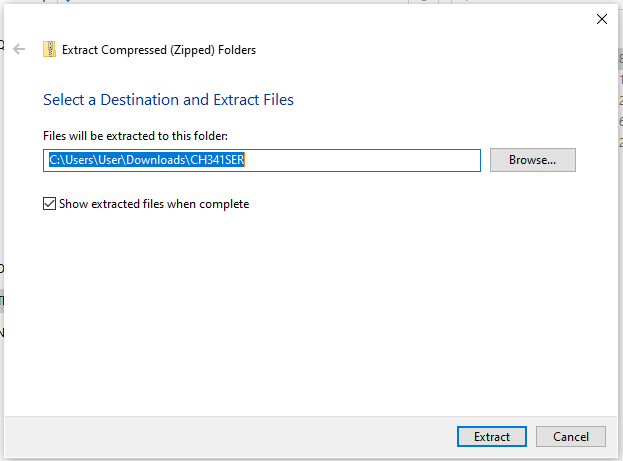
Save the CH341SER.ZIP file to the Downloads folder. Right click this file and select "Extract All..."
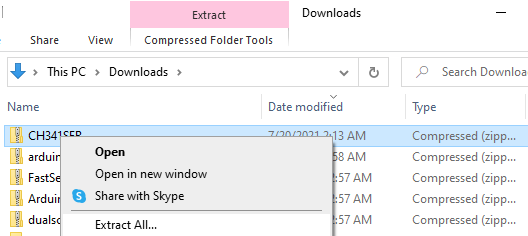
Extract the files to a sub-folder in the Downloads folder as shown below:
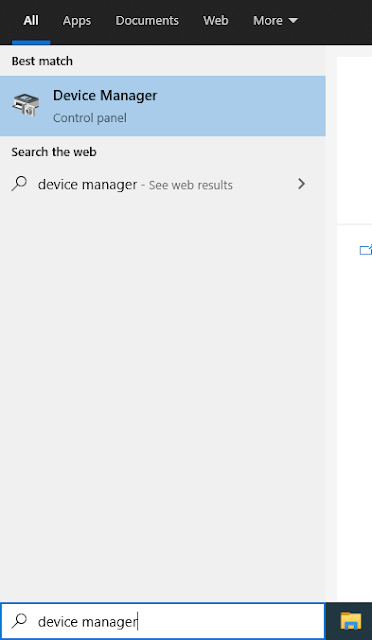
Next, open the Device Manager by whatever method you are familiar with. One is to use the search box on the Windows 10 taskbar:
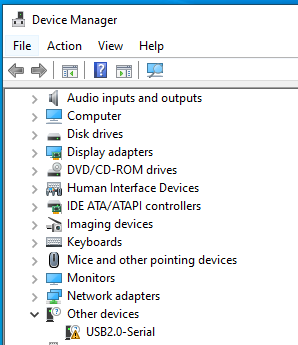
Locate the USB2.0-Serial icon with the yellow warning sign:
Double click the device and its properties will open. Click on the "Update Driver..." button.

Click on the "Browse my computer for drivers" button.
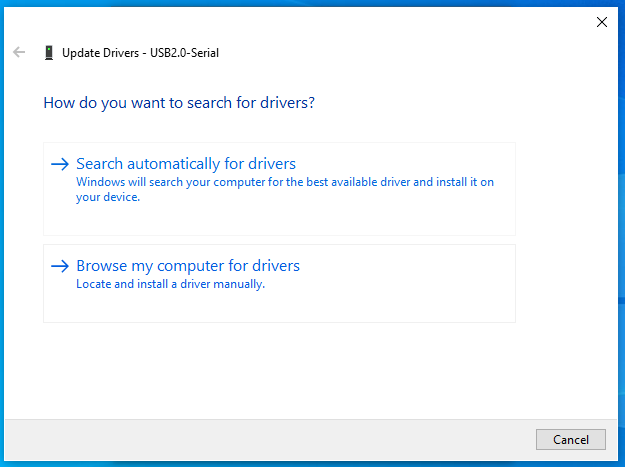
Navigate to where the drivers where unzipped, the CH341SER folder located under Downloads and click OK.

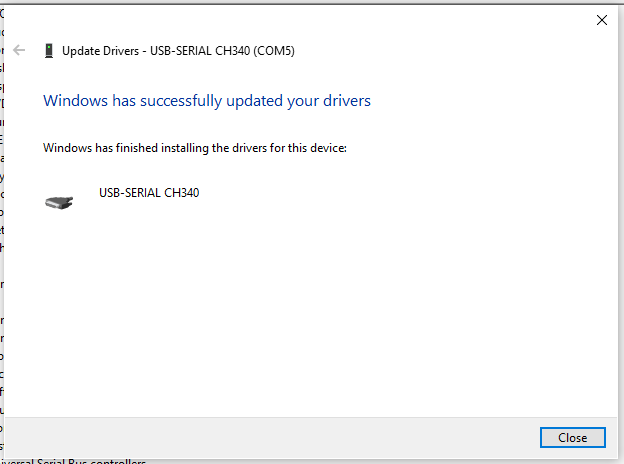
The drivers for the CH340 USB adapter will be installed, a serial port number unique to your computer will be assigned and a success window will be shown. Click "Close" and also close the Device Manager window. This concludes the Yak Shaving.
Going back to the Arduino IDE, click on Tools->Port and select the newly created port. Make absolutely sure that the USB cable is plugged in to an Arduino NANO, NOT to the Arduino MEGA and that Board shows "Arduino Nano" and Processor shows "ATmega328p".
Bad things could happen if the selected board does not match the board that is plugged in.
To make sure that the screen sketch is uploading correctly, change the date shown below and click Upload. Depending on the age of the Arduino IDE installed on your computer, the upload will either pass, or fail with a bootloader error:

If the bootloader error is show, click on Tools->Processor and select "ATmega328p (Old Bootloader)"

Click the Upload button again and the process should succeed:

To verify that the screen sketch has been updated, click Tools->Serial Monitor:
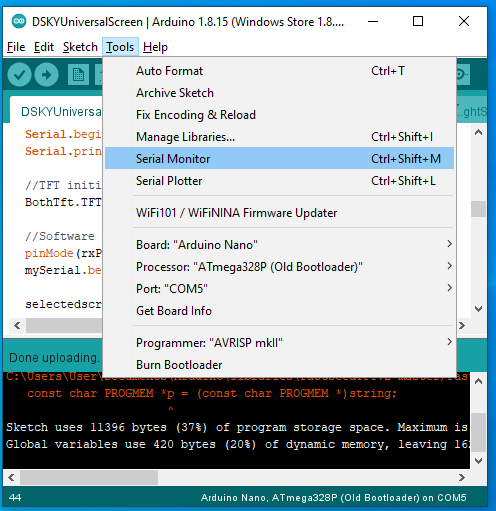
At the bottom of the screen, make sure "9600 baud" is selected and the screen should show the new date on the sketch name:

Unplug the USB cable from the right screen, plug it into the Arduino NANO located under the left screen (NOT the Arduino MEGA) and click Upload. The sketch for the left screen should be updated:
Bad things could happen if the selected board does not match the board that is plugged in.
This concludes the steps for setting up the Arduino IDE, installing the libraries needed by the DSKY sketches, installing the CH340G USB drivers for the Arduino Nano clones and uploading the sketches to their respective boards.
To setup the computer so the DSKY can be used to simulate a space mission using a modified copy of the Apollo Guidance Computer (AGC) Simulator MoonJS, follow the link below (opens in a new window)


No comments:
Post a Comment